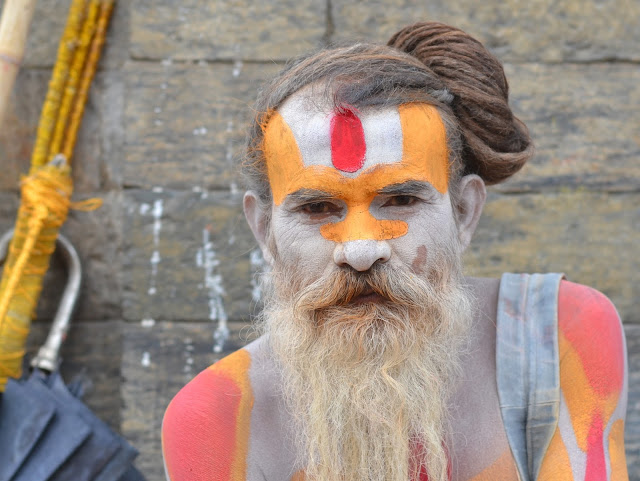
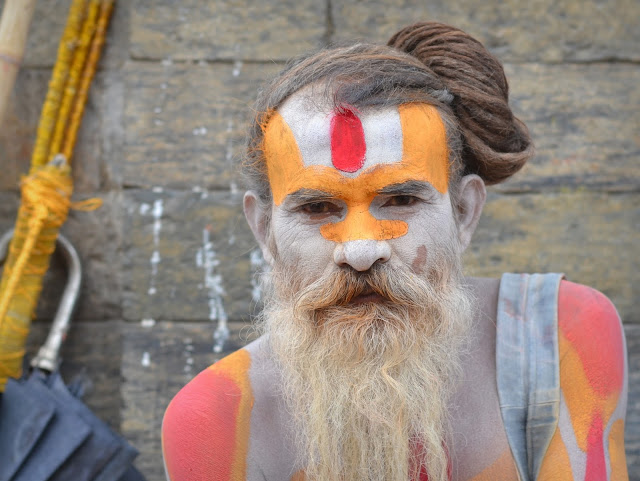
The Pareto principle (aka the 80/20 rule, the law of the vital few, or the principle of factor sparsity) states that, for many events and processes, roughly 80 % of the effects come from 20 % of the causes. Applied to the post-processing of street portraits, it means that c. 80 % or more of the raw images can be edited with c. 20 % or less of the available tools in any post-processing software, e.g. Adobe Photoshop Elements. The following simple workflow procedure for Adobe Photoshop Elements is a practical and straightforward application of the above-mentioned Pareto principle.
Step 1:
Check and decide whether to keep or delete the image (criteria: e.g. the subject’s pose/expression, the image’s sharpness and composition).
Step 2:
Straighten the image horizontally (...if necessary).
Step 3:
Crop the image into the desired/standardized aspect ratio and format (e.g. 4 : 3 aspect ratio, horizontal format).
Step 4:
Apply a subliminal, almost invisible rectangular black vignette.
Step 5:
Use the quick selection tool for selecting the face, refine the selection's edge (feather with 12 ... 20 px, smoothen, improve contrast), and sharpen the subject's face.
Step 6:
Use the quick selection tool for selecting the face, refine the selection's edge (feather with 12 ... 20 px, smoothen, improve contrast), and enhance the subject's face by adjusting the colour of the face, by using colour curves in order to lighten shadows, by removing any colour cast, by de/saturating and/or improving the vibrance of the face, and by lightening the eyes.
Step 7:
Use the quick selection tool for selecting the subject, refine the edge (feather with 8 ...12 px, smoothen, improve contrast, and inverse), and enhance the subject's background by adjusting colour and lighting of the background (e.g. desaturate and darken).
Step 1:
Check and decide whether to keep or delete the image (criteria: e.g. the subject’s pose/expression, the image’s sharpness and composition).
 |
| Unprocessed image. |
Step 2:
Straighten the image horizontally (...if necessary).
 |
| Straightened image. |
Step 3:
Crop the image into the desired/standardized aspect ratio and format (e.g. 4 : 3 aspect ratio, horizontal format).
 |
| Cropped image (e.g. 4x3 aspect ratio). |
Step 4:
Apply a subliminal, almost invisible rectangular black vignette.
 |
| Black vignette applied. |
Step 5:
Use the quick selection tool for selecting the face, refine the selection's edge (feather with 12 ... 20 px, smoothen, improve contrast), and sharpen the subject's face.
 |
| Face sharpened. |
Step 6:
Use the quick selection tool for selecting the face, refine the selection's edge (feather with 12 ... 20 px, smoothen, improve contrast), and enhance the subject's face by adjusting the colour of the face, by using colour curves in order to lighten shadows, by removing any colour cast, by de/saturating and/or improving the vibrance of the face, and by lightening the eyes.
 |
| Face enhanced/improved. |
Step 7:
Use the quick selection tool for selecting the subject, refine the edge (feather with 8 ...12 px, smoothen, improve contrast, and inverse), and enhance the subject's background by adjusting colour and lighting of the background (e.g. desaturate and darken).
 |
| Background enhanced/improved; done. |
Examples:
High-res street portraits with full exif data, geotags and technical details in Matt Hahnewald's
Flickr Albums: Facing the World
Flickr Albums: Facing the World


1 comment:
Very interesting blog, thank you Matt for putting this online, great work. Enticing pictures and informative texts are both of high value for me, will not forget to come back regularly.
Jurgen
Post a Comment